
Cloudflare DNS Hosting and your hosting plan
When it comes to hosting, I prefer something other than cPanel hosts, such as HostGator. But It’s a user-friendly platform that acts like a command center for your website, giving you control over your domain, emails, files, and so much more. Once you’re all signed up, here are the next steps to get your site up and running:
- First, add your domain in your cPanel. This essential step creates the link between your domain and your hosting service.
- An SSL certificate will automatically be generated once the DNS records propagate. This step is a crucial component for secure connections between the server and the client.
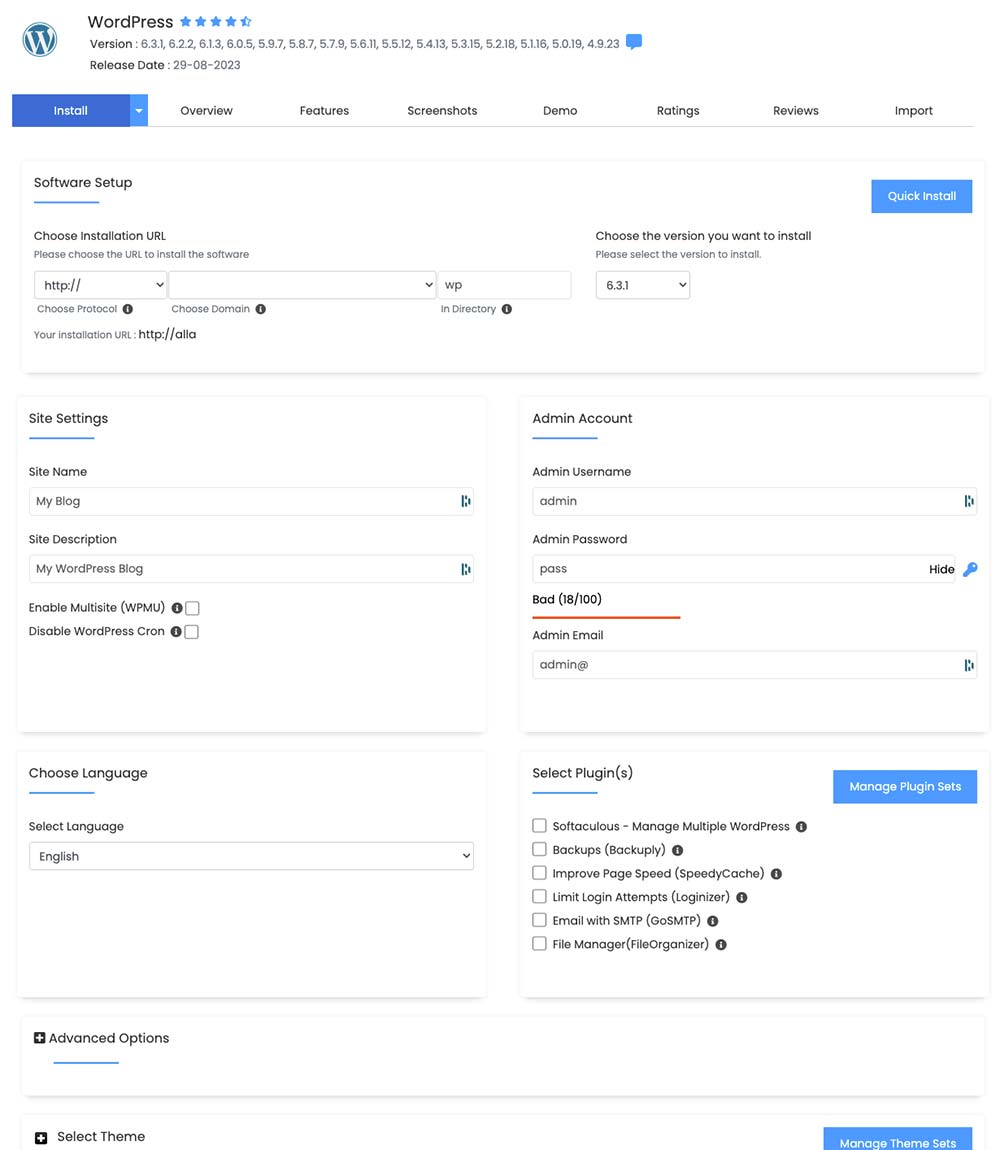
- Next, use Softaculous, a one-click software installer, to install WordPress. Remember to keep your passwords in a safe place!
Initially, you’ll see a default WordPress page until we point the domain to your hosting service. To do this, we’ll need the server IP address from your cPanel (it usually looks something like 123.456.789.123).
step-by-step guide:
Once your domain is pointed to Cloudflare, the next step is hooking it up in your web hosting control panel. This connects your domain to the right folder on the server to display your site.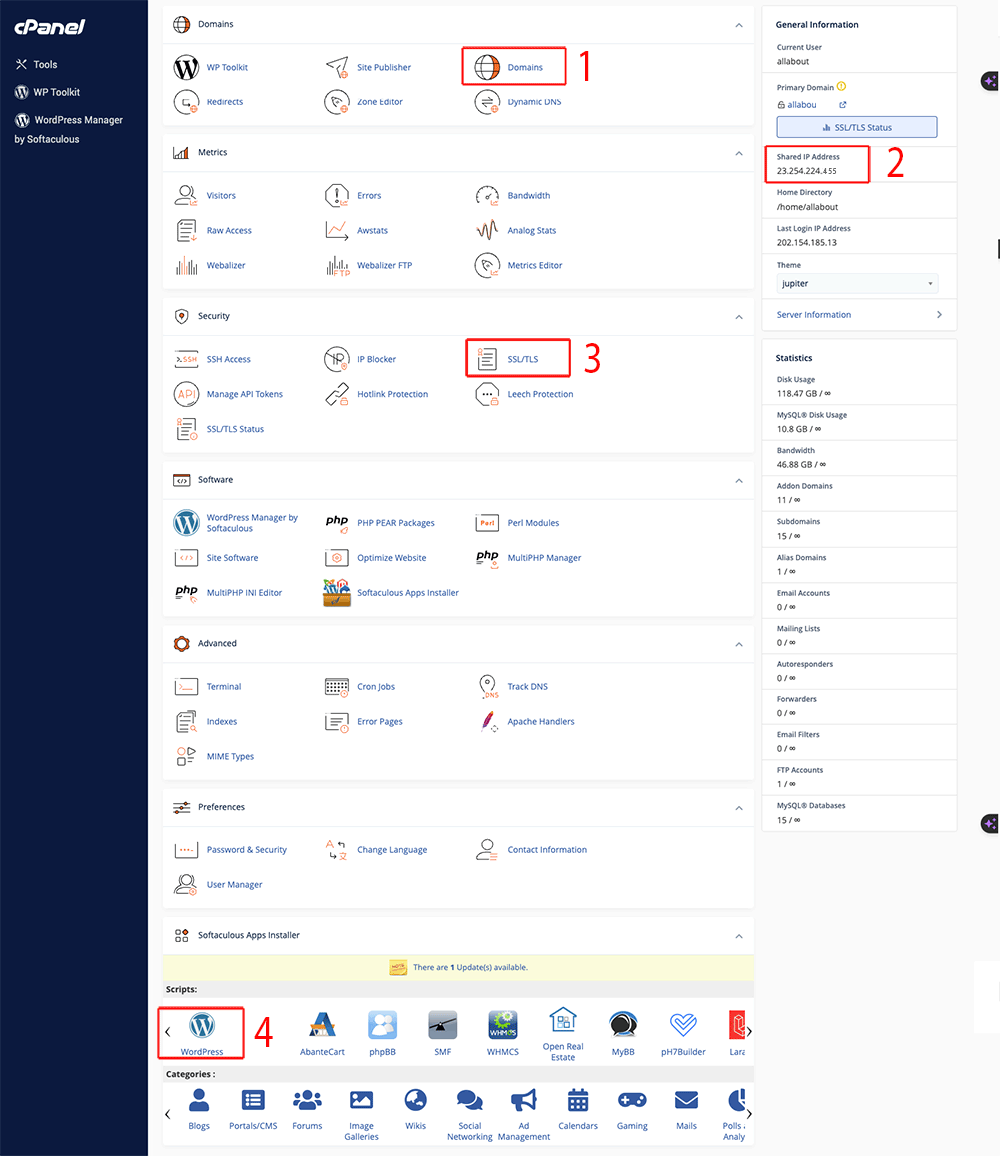
For cPanel hosts, here are the key places to configure:
Add Domain – This maps your purchased domain name to your hosting account. Enter it exactly as registered.
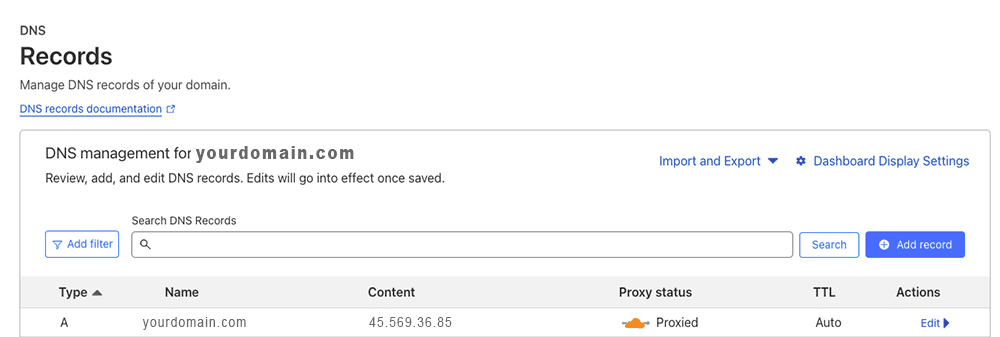
Server IP Address – Locate the server IP address in cPanel and use this in the A record on Cloudflare. This tells Cloudflare where to send traffic.
Enable SSL – Click to generate a free SSL certificate to encrypt traffic. Most hosts make this simple with one click.
Install WordPress – Use the web host’s installer like Softaculous to deploy WordPress. Select your new domain during the setup.
Once the domain and A record propagate, your domain will point to the correct hosting folder with WordPress installed and secured with SSL. Visitors will seamlessly access your new site!
The control panel connects all the pieces between registrar, DNS, domain, and server. Configuring the key settings bridges the gap so your custom domain displays your WordPress site.
Making Connections with Cloudflare
Now, let’s jump back into the world of Cloudflare to complete the setup:
- Start by copying the nameservers provided when you add your site to Cloudflare.
- Paste these nameservers into your domain registrar (for instance, GoDaddy) to channel traffic through Cloudflare.
- Finally, add an A record in Cloudflare, which points to your server’s IP address.

Preparing for the Next Steps
Before we wrap up, remember that we still need to configure the security rules in Cloudflare. This step is crucial in ensuring that your website remains secure from potential threats:
- Enable ‘Always Use HTTPS’ for secure connections.
- Turn on rate limiting to safeguard your site from traffic spikes and potential attacks.
- Safelist your IP to maintain access to your site during the development phase.
- Activate DDoS protection to ward off malicious traffic.
Once the DNS settings propagate and your domain starts pointing to your hosting service, your site will officially be live!
Cloudflare offers a wide range of advanced firewall settings, but these steps cover the basics to get you started. With these in place, you can confidently develop your site, knowing it’s secure.
If you need a hand with your specific setup or have suggestions for other beginner topics, feel free to reach out.
In our next post, we’ll delve into SSL certificates and how they encrypt traffic for a safer online experience. Stay tuned, and happy web building!